How to use the S3 Virtual File System (VFS)
Syncplify Server!, through its virtual file system (VFS) data storage layer, can store your SFTP server's data into various storage back-ends. This article explains how to use the S3 VFS type that stores your server's data into an Amazon (AWS) S3 object storage bucket.
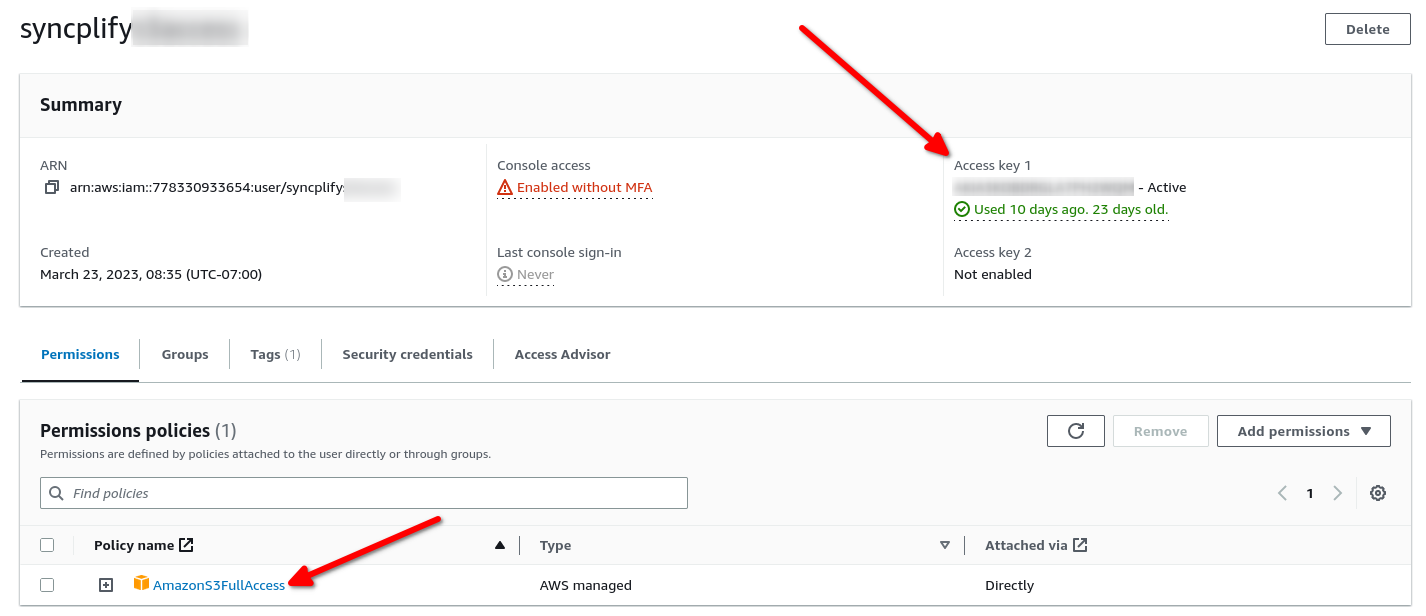
First of all you'll need an AWS IAM user account to access the S3 bucket. Head over to the IAM section of your AWS Console, and create one:
Make sure the newly created AWS user has at least one Access Key, and that it has the desired permissions to access your S3 buckets. In this picture we show an account that has full access, but for safety reasons you should always only grant the minimum set of permissions your workloads require.
At this point you are ready to create your S3 bucket(s):
Please make sure you deploy your S3 bucket in the AWS region you need it to be in, and make sure your security policies comply with the security requirements of your company/entity (typically you do not want your bucket to be publicly accessible, you probably want it to be accessible only by using the Access Key you created for the user profile above).
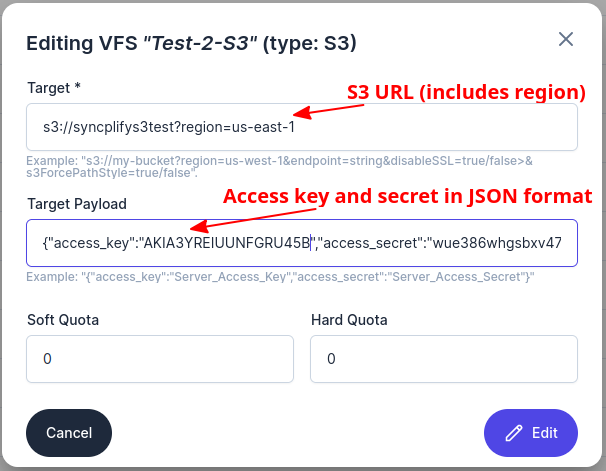
Now that everything is ready on the AWS side of the house, let's see how easy it is to create a Virtual File System (VFS) in Syncplify Server! v7 that uses your S3 bucket to store your SFTP server's data:

Make sure your S3 URL includes your bucket name and region, if the region is missing us-east-1 will be assumed. Then input your access_key and access_secret as your Target Payload (in JSON format). No worries, Syncplify Server! uses strong encryption to store all secrets in its internal database. That's all there is to it. You can now assign this VFS to any User account in your Syncplify Server!, and its data will be stored in your S3 bucket.


