High-Availability (HA): how to setup
This article assumes you've already read, understood, and are familiar with the general concepts explained here.
Once you have decided how to deploy your Syncplify Server! high-availability set, going from theory to practice is actually quite simple: it's just a two-step process.
Step #1: deploy the first node as if it were a single stand-alone server
This procedure is very well explained here (for Windows) and here (for Linux).
Before proceeding with Step #2, ensure that the system clock on every node in your HA cluster (including the one you are about to add) is synchronized with a reliable time source. The recommended way to achieve this is by enabling NTP on all nodes. If even a single node has an out-of-sync clock, the entire HA cluster will not function.
Step #2: adding the second (or n-th) node to make your HA set
If you are familiar with the single-node setup of Syncplify Server! (see step #1) then you surely have noticed that, at the beginning of the web-based part of the installation process, you're presented with the following choice:
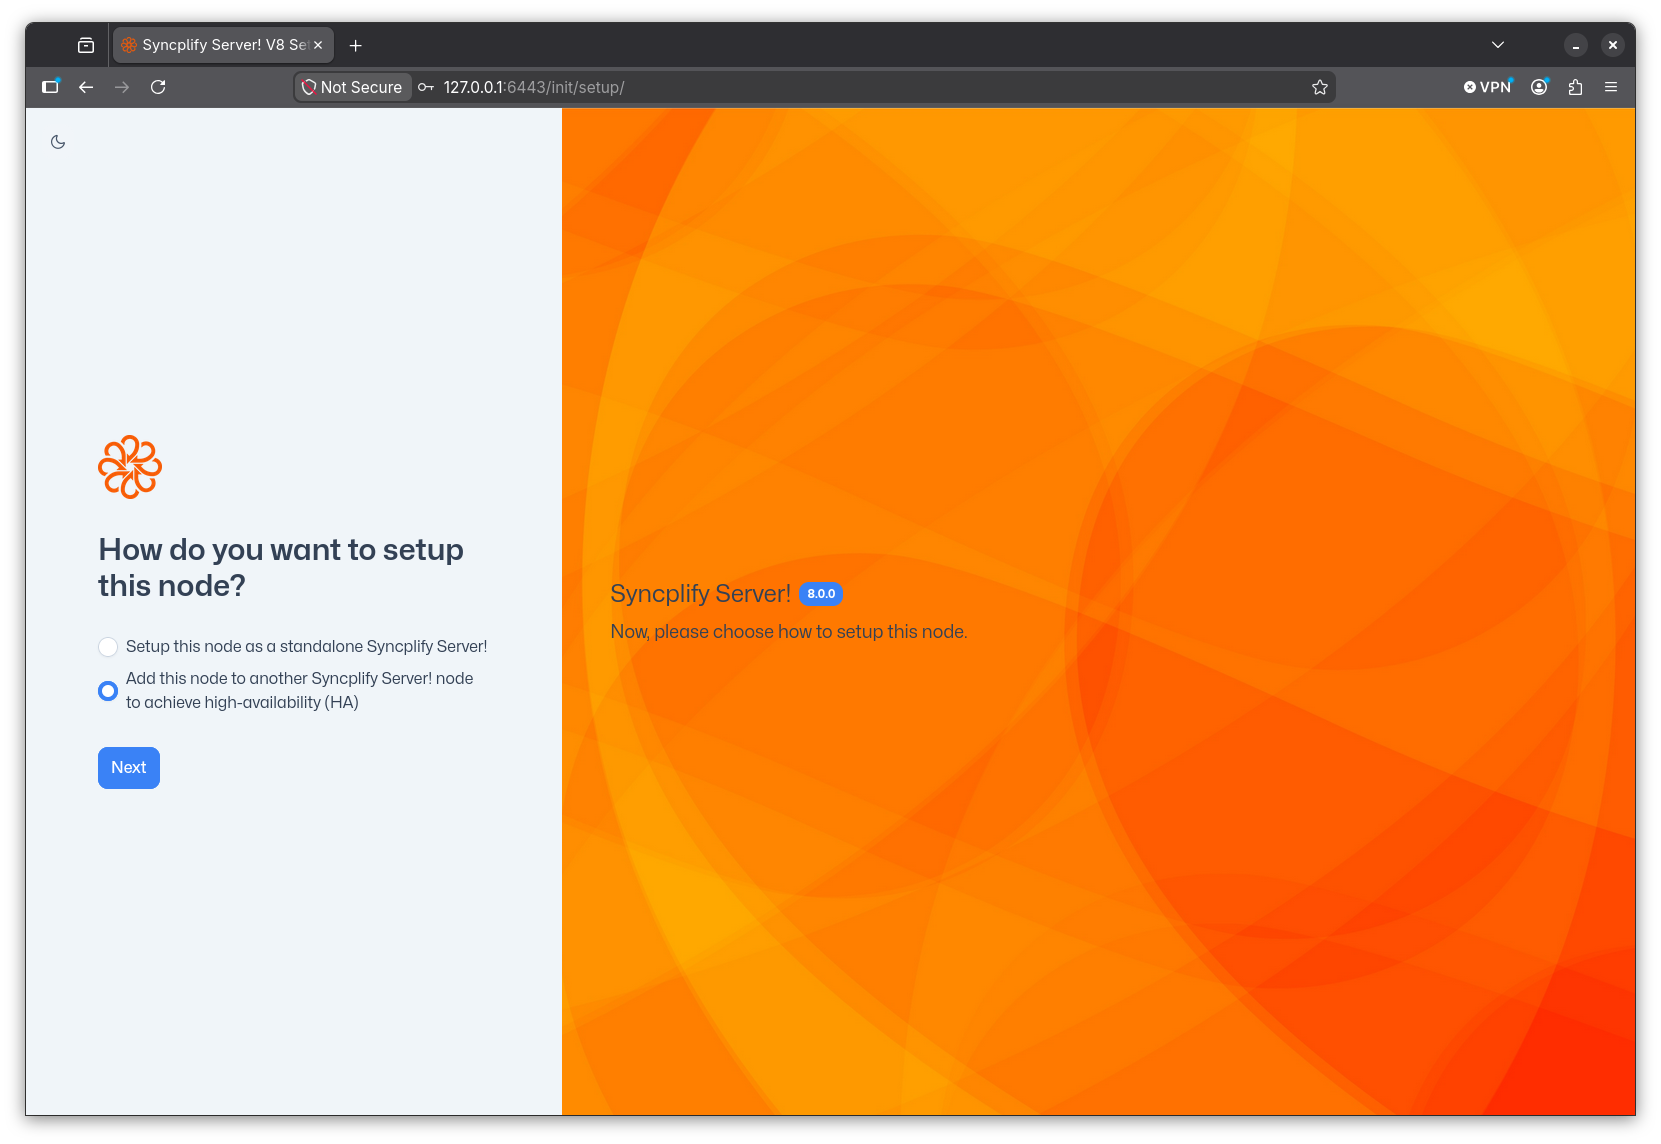
To deploy your HA set you simply have to install Syncplify Server! on another node (machine or VM) and, when presented with the above choice, you'll select the "Add this node to another..." option.
You will then need to type the IP address and port (separated by a single colon) of the first node, the one you previously installed as a single stand-alone server. For best performance and optimal routing you should always use the nodes' internal (LAN) IP addresses here.
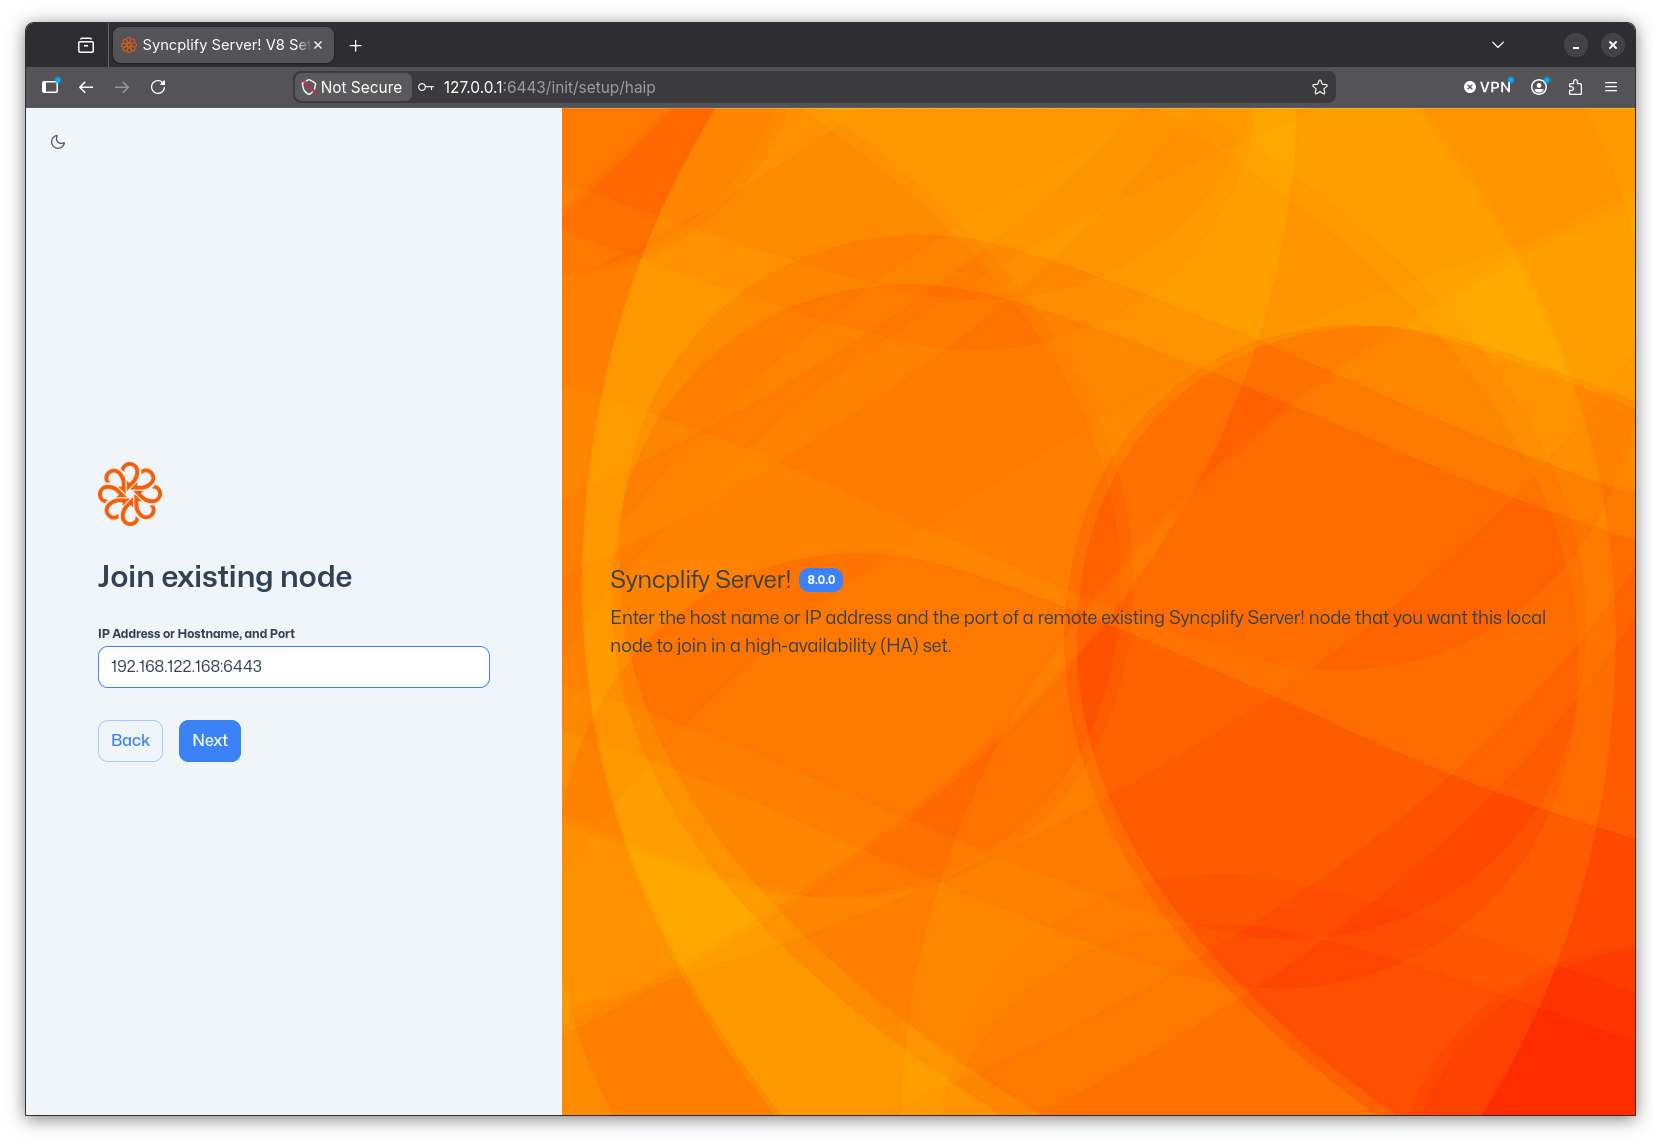
Do not try to be creative here, do not type anything exotic like the nodes' NetBEUI names "just because Windows knows it" or similar oddities. It will not work. Please, just follow the instructions and type the LAN IP address and port of the existing node you want to join to create your high-availability set. Thank you!
At this point you will have to provide the SuperAdmin credentials of the remote node you wish to join.
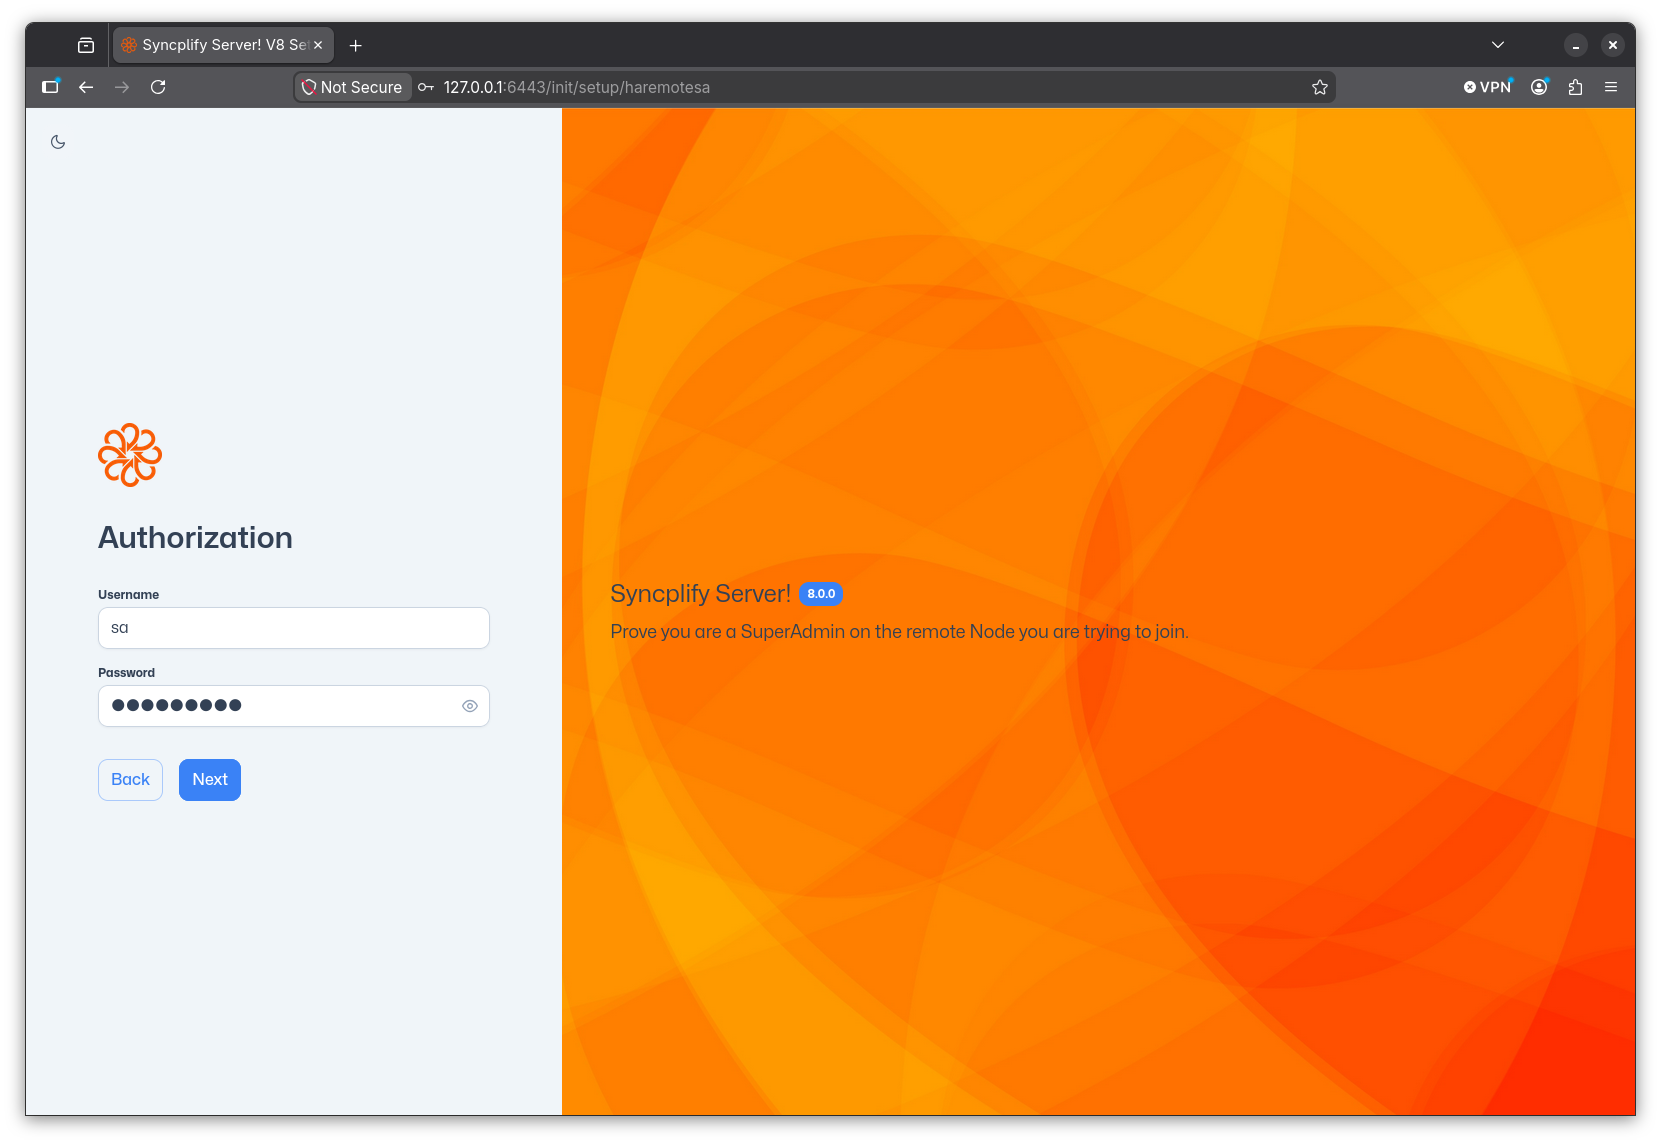
Once you click Next the node you're setting up with attempt to join the remote node to establish itself into the HA cluster. You will see a spinning progress - this process can take a while, so please be patient.

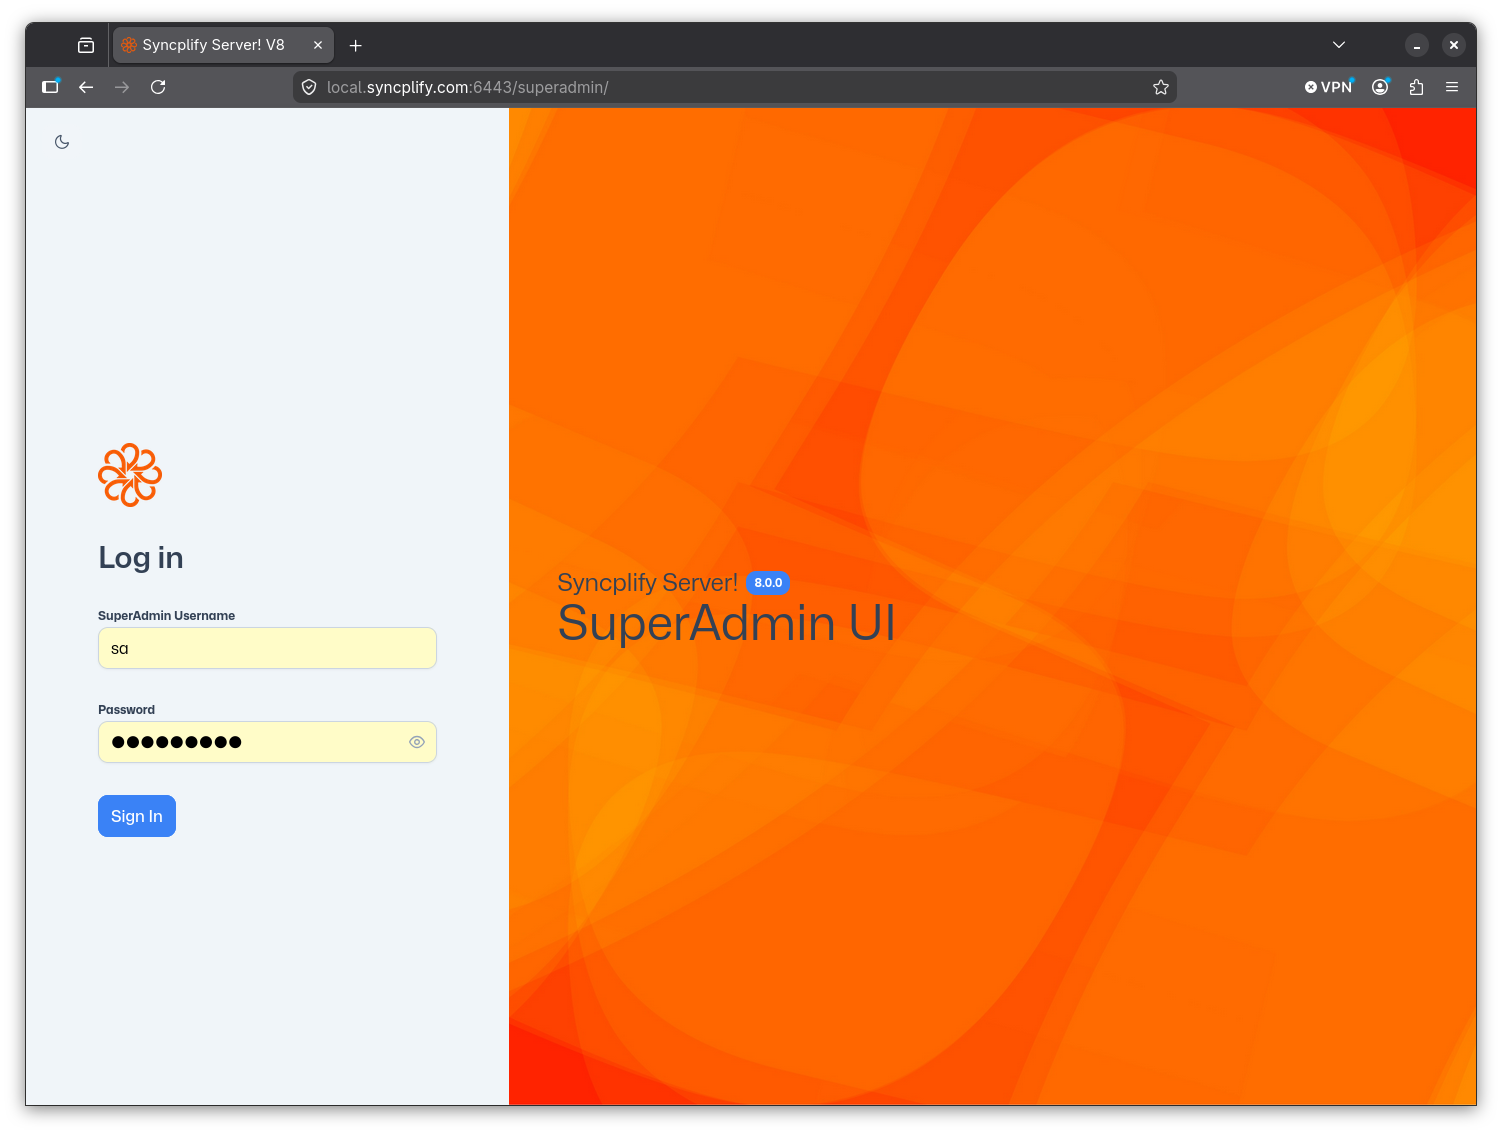
If everything goes well, once the newly installed node has become part of your HA cluster, you will simply be redirected to the SuperAdmin UI where you can login with the credentials you already know.
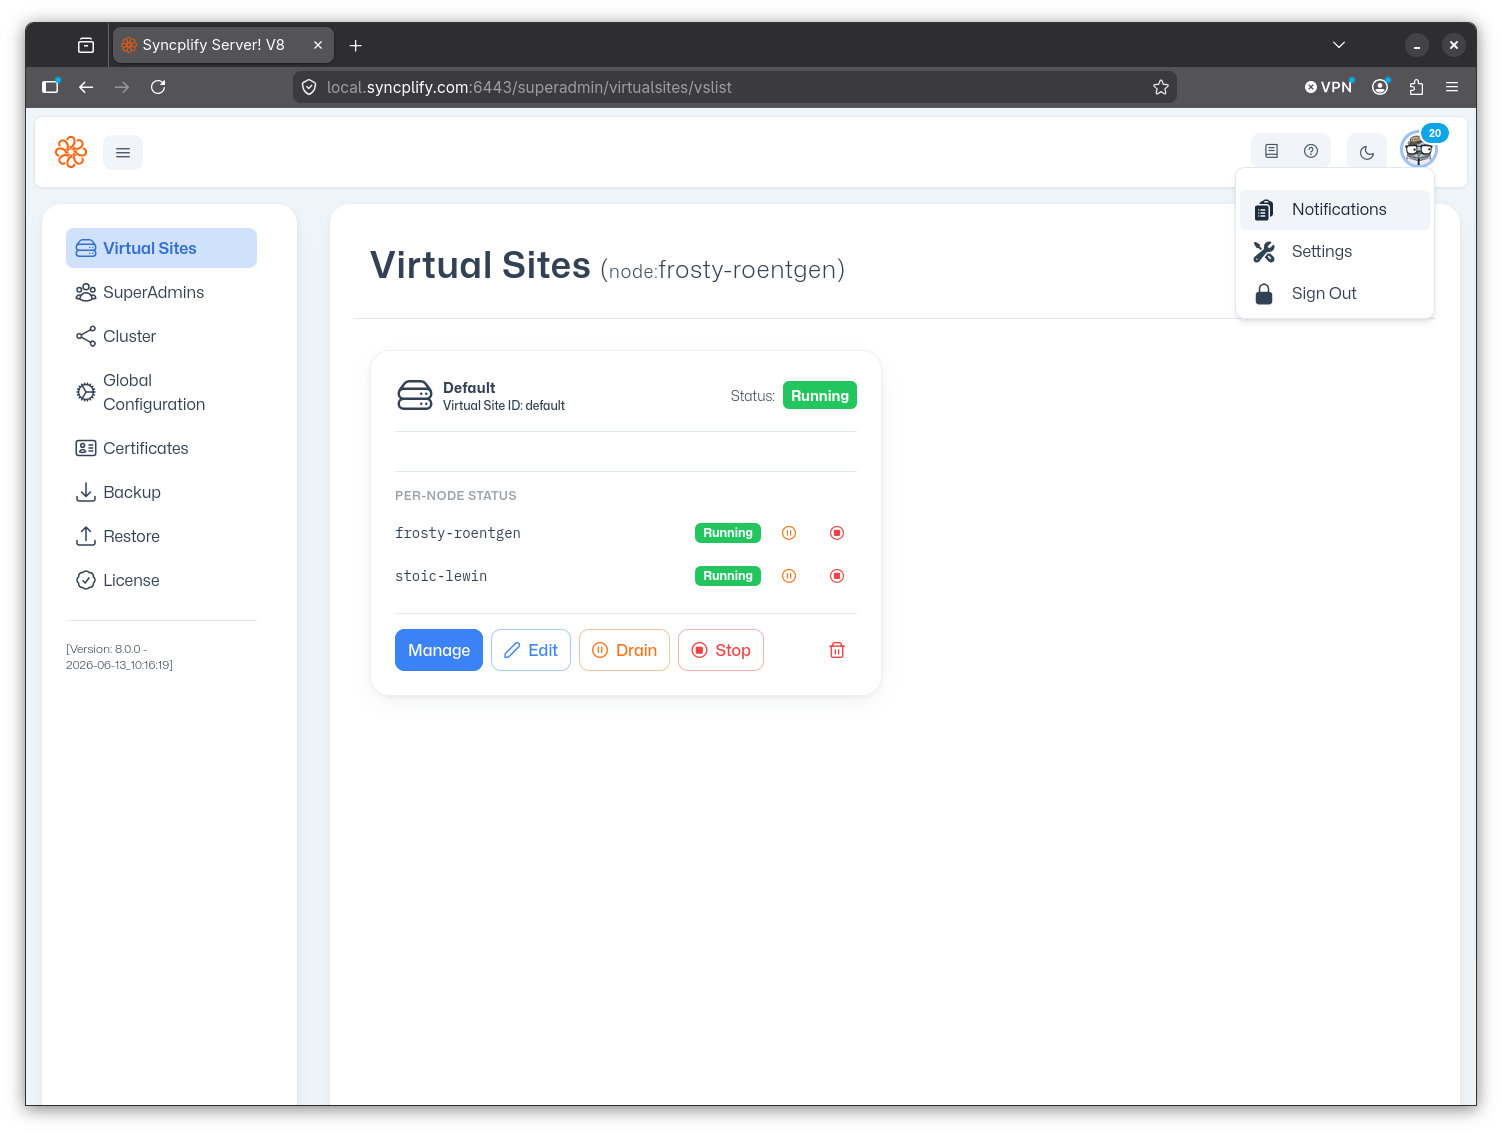
You'll notice a few things when you log into the SuperAdmin UI and your node is part of an HA cluster. Each virtual site card in the Virtual Sites page will now show the status of all the cluster nodes:
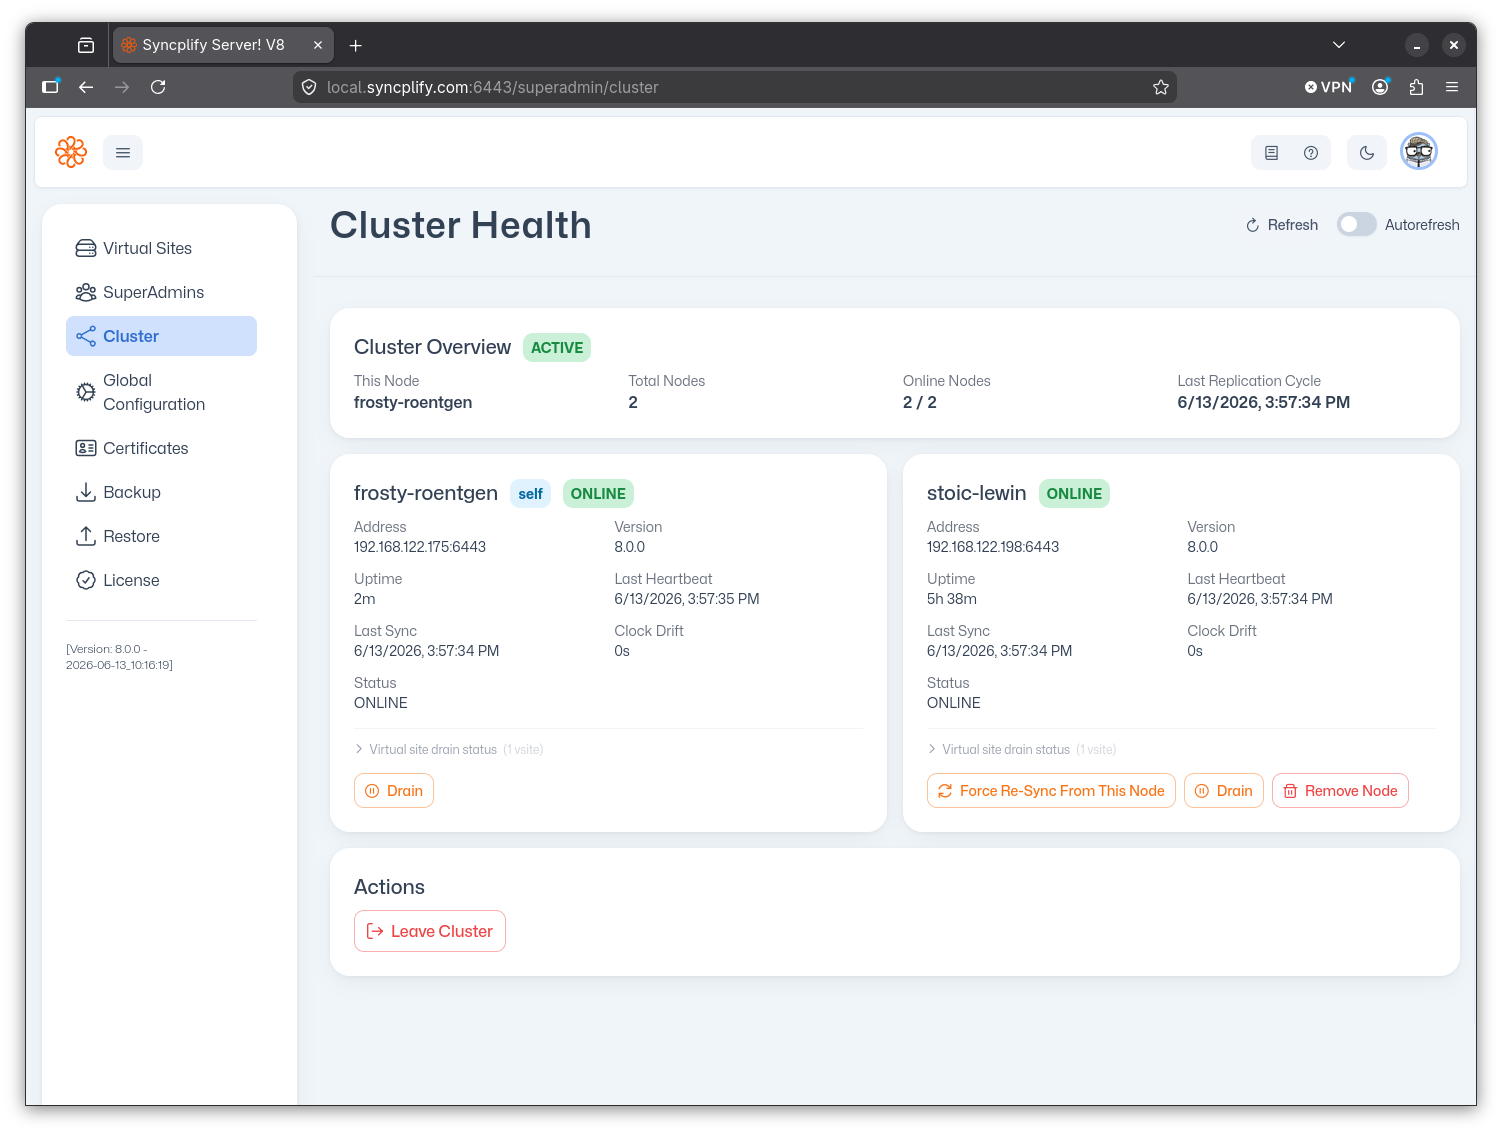
And there is now a new page in the SuperAdmin UI, called Cluster, that provides you full observability and maintenance actions for your entire HA cluster and each node that's part of it:
Step #3: safe-list your load balancer(s)
If your HA deployment includes a load balancer (or multiple load balancers), this step is mandatory.
Load balancers continuously probe SFTP nodes by opening connections and then closing them, often without completing authentication. This is normal and expected behavior. Syncplify Server!'s built-in Protector! mechanism, however, cannot distinguish between a load balancer health-check and a connection-flood attack. Without intervention, Protector! will eventually auto-block the load balancer's IP address, which will bring down the entire cluster from the clients' perspective.
The fix is straightforward: add the IP address of every load balancer to the safe-list. Safe-listed addresses are never auto-blocked by Protector!, regardless of how they behave. This is precisely the scenario the safe-list was designed for.
For a full explanation of the difference between the block-list, allow-list, and safe-list, see this article.