Setup on Windows (CLI)
Some versions of Windows Server, especially the recent 2016, 2019, and 2022, can be installed without the graphical desktop that gave Windows its name in the first place. This makes for a usage experience that many Linux administrators are most familiar with, allowing Windows Server administrators to run their operating systems without any GUI environment, where every operation has to be performed via CLI (command-line interface) just as they would do within a Linux terminal.
Fear not! We got you covered. The same CLI installer that we have developed for Linux, also works on Windows, and the only difference is how you type in the command line to use it (as Windows relies on PowerShell, while Linux may use a variety of different and mostly-POSIX shells).
The automatic way to install
The simplest and entirely automatic way to install Syncplify Server! on your Windows machine/VM without "Desktop Experience" is to run PowerShell as Administrator, and simply type in (or copy-paste) the following command:
Invoke-Expression (New-Object Net.WebClient).DownloadString('https://dl.syncplify.com/ss6-setup-win-x64.ps1')This will automatically download the ZIP archive containing the most recent version of the software, extract it to a temporary location, then run the CLI installer for you.
The above should work just fine with PowerShell 6, but PowerShell 7 is highly recommended. Also, please bear in mind that after the CLI portion of the installation, you'll still have to go through the web-based portion of the initial deployment as per the instructions you'll see in your PowerShell window.
Download then install manually
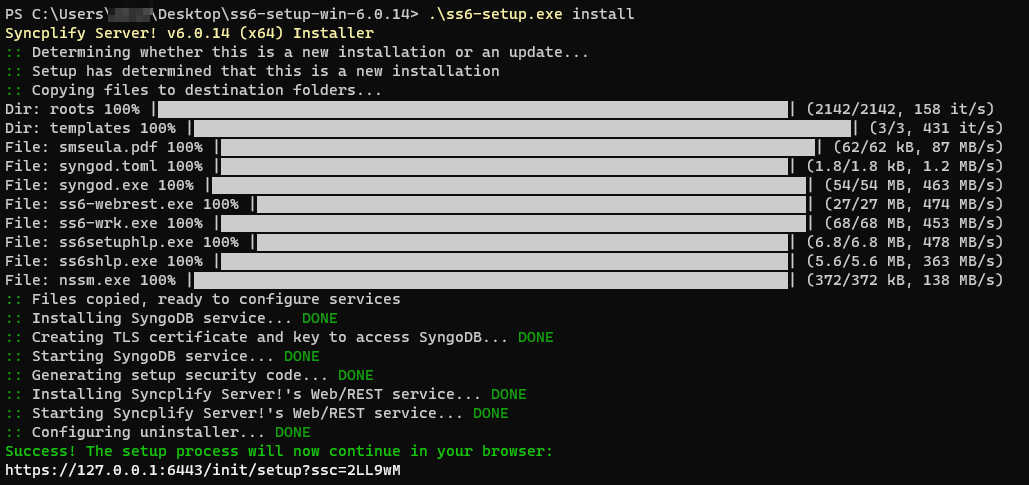
First of all you will need to download the most recent version of the CLI installer for Windows from our website. Extract the archive, and then type the following in a Terminal window (PowerShell or CMD.EXE):
.\ss6-setup.exe installAt the end of the setup process, open a browser and point it to the provided URL.
Be careful, the URL references localhost (127.0.0.1) but if you're using a browser on a different computer you will have to change 127.0.0.1 into the current IP address of the machine where you just installed Syncplify Server! on.
The same install command line argument will also update/upgrade your software (without affecting your configuration) if Syncplify Server! is already installed in your system.
How to uninstall
Use the same ss6-setup from the zip archive you downloaded (or download the most recent one, doesn't matter) and type the following command into a Terminal window (PowerShell or CMD.EXE):
.\ss6-setup.exe uninstallHow to update/upgrade
When the CLI installer is invoked with the install verb, it will automatically try to determine whether the software is already installed on the system, and - if that is the case - perform an update/upgrade rather than a new install.
There is, however, a way to force the CLI installer to perform an update/upgrade, when you already know that this is the case. You can simply add the --update flag to the install verb, like this:
.\ss6-setup.exe install --updateAnd, just in case... you can also do a "repair"
Should anything happen, you can always use the same ss6-setup you downloaded and extracted, to "repair" your currently deployed executable and back-end DB configuration, like this:
.\ss6-setup.exe install --repairMore useful command-line flags
There are a couple additional command-line flags that you may want or need to use occasionally. Both of them are intended to be used in conjunction with the install verb.
| Flag | Purpose of the flag |
--trace |
Enables trace-level logging for the installation process. This will produce a larger and more detailed installation log, useful to identify the cause of possible installation issues. |
--norollback |
Typically, should something go wrong during installation, a rollback operation is performed, to leave your system unchanged. This flag disables such rollback, so that your system remains partially modified even after a failed installation. This is useful in some cases for debugging. |
That's it. :)
Did you know?
The Windows GUI and CLI installers are interchangeable, meaning that you can install version 6.2.42 using the GUI installer, then upgrade to v6.2.43 via the CLI installer, and then upgrade to v6.2.44 with the GUI installer again.
